Back in March, I made my brother’s wedding invitations and they’re a great example of professional looking invitations that you can achieve with a home printer. Since watercolor washes and hand lettering are very hot right now, I decided to incorporate their wedding colors and greenery into something very modern and simple using both of those trends.

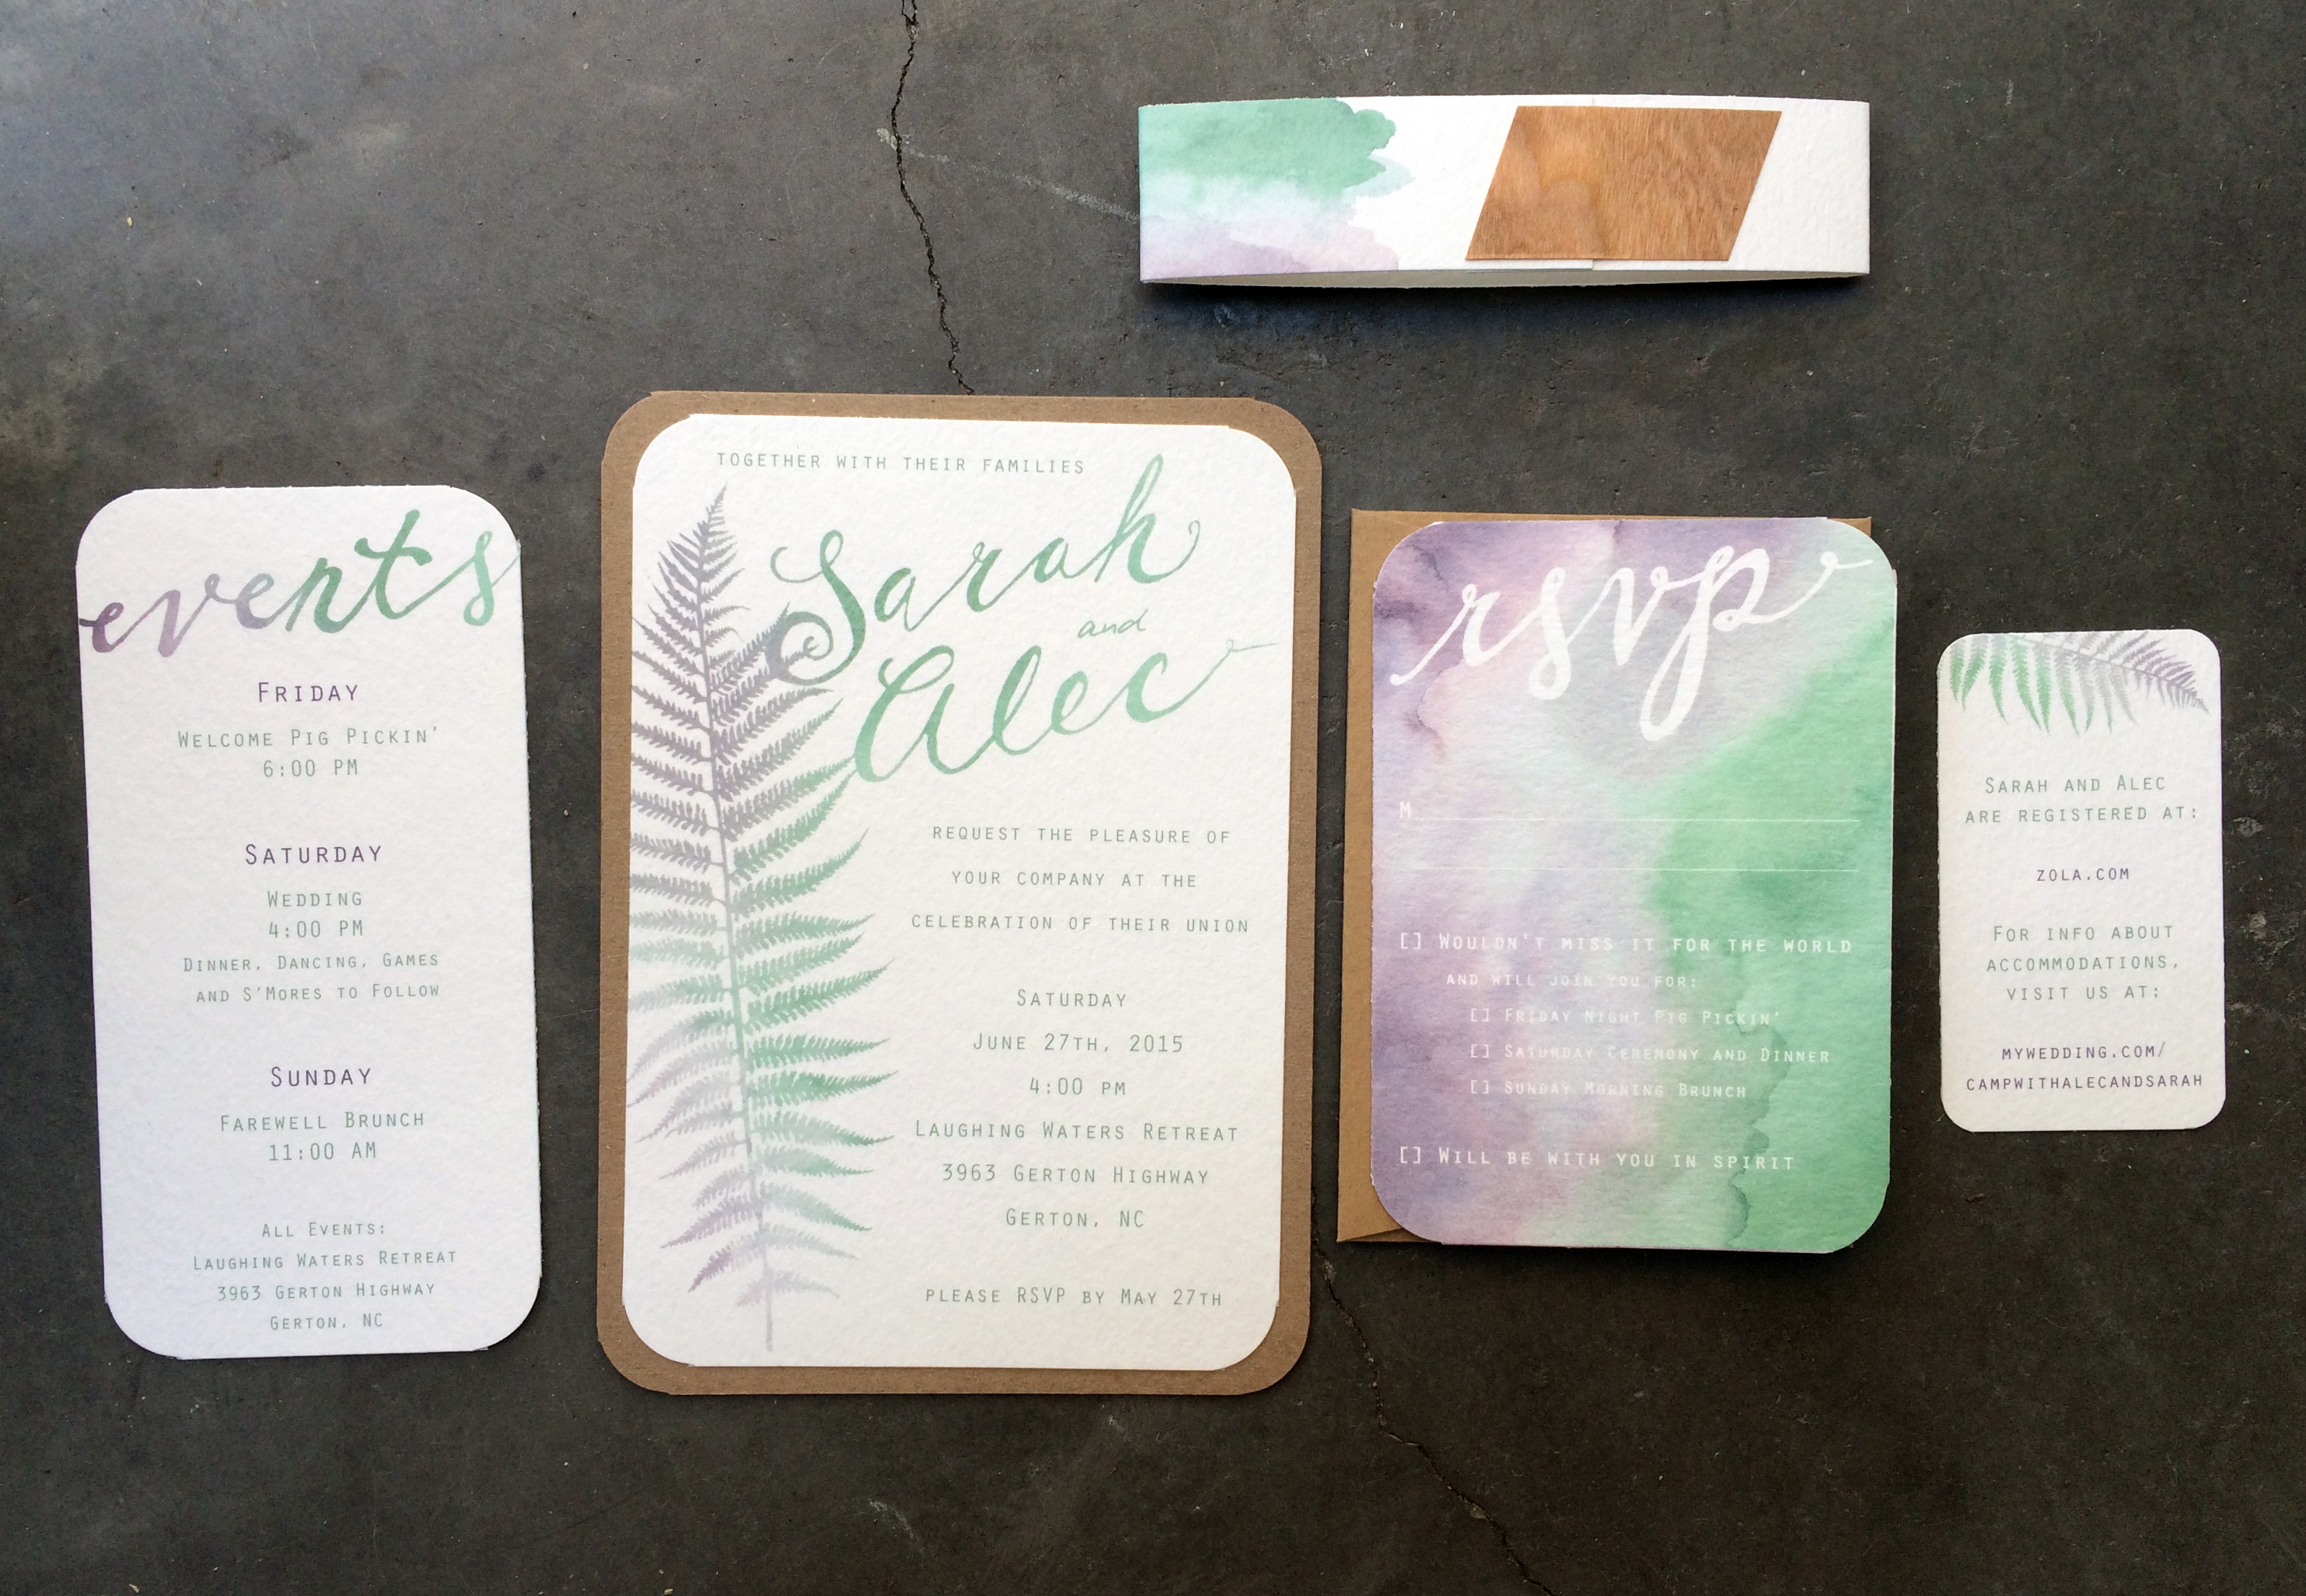
The invitation straight from the envelope; a single sided, flat card with a paper “ribbon” that holds everything together.
While I adore very traditional and clean invitations as well, those look best letterpressed on heavy paper which can be very expensive. If you were to print something like that at home, they would look really cheap and chintzy. By designing something a little bit more elaborate and colorful, printing on a home printer doesn’t effect the overall quality. The type of paper you print on also helps a lot, so think outside of the box. If you have a rear loading printer (which I highly recommend), you can jam fairly heavy paper through it. For these invitations, I cut down a Strathmore Watercolor paper to 8.5″x11″, but one of my other favorites for invitations is the Strathmore Bristol paper. I also mounted the printed invitation onto a heavy kraft chipboard to add some weight, making them feel more special and expensive.

I stacked all of the enclosure cards by size and secured them to the back of the invitation with the paper “ribbon”. I used real wood tape to hold the ends of the ribbon together.
Here are some other tips for tricking people into thinking your invitations were super expensive :
- Rounded or punched corners. There are so many paper punches and cutters available online or at the craft store. You can have eyelet corners or simple rounded ones like these or even full lace edges.
- High resolution printing. I’ve received too many handmade invitations that looked ridiculously cheap because the resolution was low and the images or text were pixellated. It’s one thing to make your own invitations, it’s another thing to not try at all! It’s your wedding, not your birthday pizza party.
- Get fancy with your address labels. Print well designed, coordinating labels or spend some money having your envelope addresses hand-lettered. Nothing says “cheap invitation” like Times New Roman on a clear sticky label from Staples!
- Buy paper from an art store instead of an office store. This is a gross generalization because there are nice printer papers out there these days, but there are definitely more options at an art store, from drawing pads to photo printer papers created for professional photographers. This is where your rear paper feed, ink jet printer will come in handy.
- Get a printer for crafting. I regret buying my high-end Epson everyday. I never use it because it has a front drawer feed so the paper has to make a sharp bend to get through the machine and the inks don’t work on specialty papers like water slide paper, vellum, or transparencies. I had to buy a separate printer that could handle all sorts of media and tasks and I love it, but I never expected to only use my Epson as a scanner. It’s pretty sad. Do yourself a favor and get the Canon I have. It’s tiny and a freaking badass workhorse.
- Get pretty stamps….and I mean actually pretty…not just those damn “love” stamps because you think you have to get those for your wedding. Some of the “love” stamps are super ugly! Take your finished product to the post office and ask exactly how much postage you’ll need on each one. If they only have ugly stamps, then order ones you like online at usps.com and combine them to get the postage you need. There are also much prettier “love” stamps online than there are in most post offices.

The invitation laid out with the enclosures, RSVP card and paper “ribbon”.